
html2wp / Guides / Lovable to WordPress
Lovable to WordPress: a project converted into a real theme
Converting Lovable to WordPress is the same job as converting HTML to WordPress, with one extra step. An older Lovable project is a React app, so its HTML has nothing in it to convert: the page only appears in the browser, once the JavaScript runs. Newer projects (TanStack Start, since May 2026) render their pages on the server, and html2wp converts both kinds the same way. This walkthrough takes you from such a project to a WordPress theme that carries your code, not a rebuild of it. Every step comes from a real conversion, and you can open both ends of it.
A Lovable to WordPress example, open at both ends
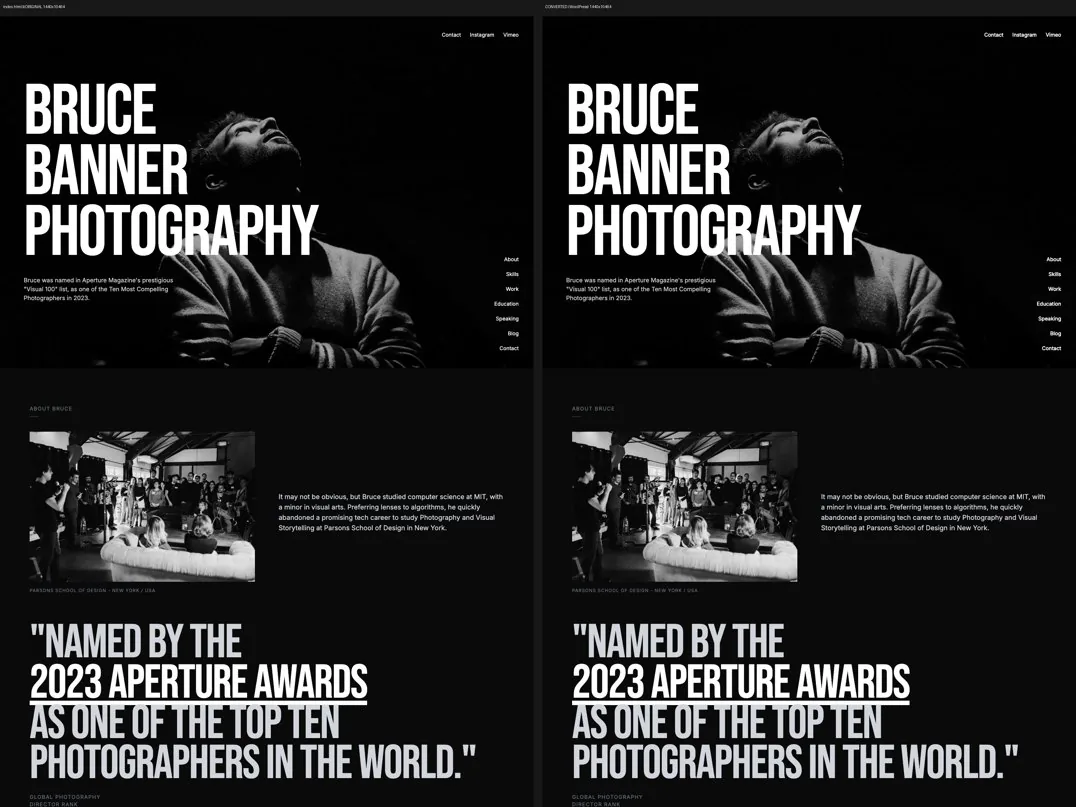
Everything below describes a conversion we actually ran. The original is a Lovable app: bruce-banner.lovable.app, a photography portfolio. The result is bruce.html2wp.dev, running on WordPress. You can get into its admin at /wp-admin with the username demo and the password demo.
The conversion produced five pages and five posts on the theme bruce-banner. That fits in the free tier, which converts up to five pages per conversion and needs no key. Open both sites side by side before you read on. This article is about the difference between them, so you can measure it yourself.
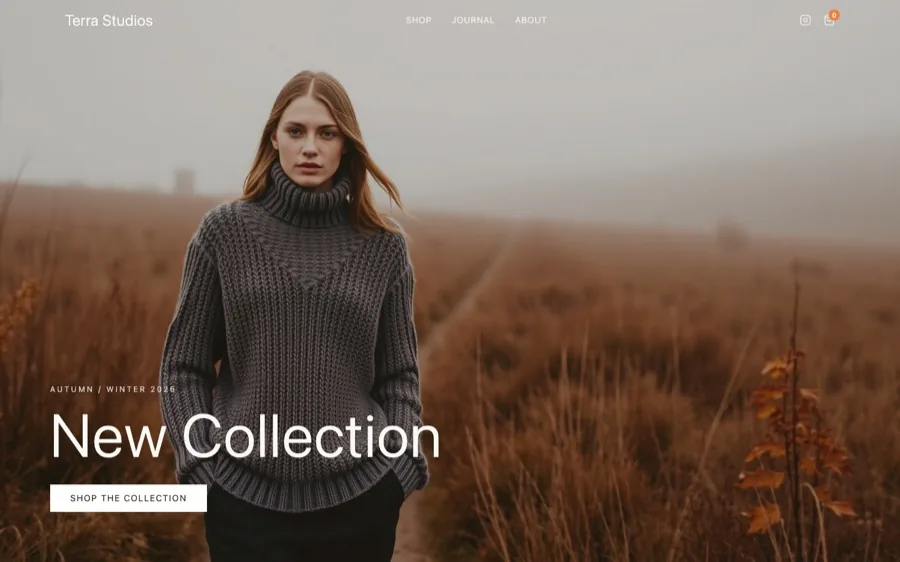
Two more Lovable conversions are open the same way. First, spark-remix-kindred.lovable.app became terra.html2wp.dev, a knitwear shop on WooCommerce. Then bloom-echo-remix.lovable.app became soria.html2wp.dev, a wedding photographer’s site. On all three, the WordPress admin login is demo / demo.
What “1:1” means here, exactly
The code the Lovable app builds in the browser is the same code that goes into the theme. Nobody rebuilds your sections as page builder widgets, so you never get a page-by-page approximation of the design. Every step below follows from that.
What your computer needs to convert Lovable to WordPress
The build, the browser work and all the checks run on your machine. Only the built output goes to the service that generates the theme. So this is not a web service where you upload a ZIP, and it has requirements you should know about up front:
- Node 20 or newer for the build and the local scripts.
- Python 3 with the Playwright and Pillow packages. Playwright drives a real browser, and that is how a React app turns into HTML.
- Docker with the
docker composecommand. It starts a temporary WordPress on your computer, and the converter checks the theme there before you see it. - php-cli, because every PHP file goes through a syntax check before it goes into the ZIP.
jq,curl,bashandtar. The target WordPress must be version 6.6 or newer.
The plugin checks all of this in the first step and prints two lists. The first shows what it can install by itself inside your own folders. The second shows what you have to decide: Docker, a newer Node and starting Docker. It never installs the second group behind your back.
Docker surprises people the most
Other converters don’t need it, because they skip this step. Here the converter installs the generated theme into a real WordPress and tests it there. That is what the browser and the container are for. If you want a five-minute tool in the browser, this is not it.
Install the plugin
We publish the plugin twice, once for each agent. The scripts and the version number are the same for Claude Code and Codex. Pick the one you use.
Claude Code
/plugin marketplace add iOSDevSK/html2wp-cc-plugin
/plugin install html2wp@html2wp
Then, once, in a terminal:
python3 -m playwright install chromium
Codex
codex plugin marketplace add iOSDevSK/html2wp-codex-plugin
codex plugin add html2wp@html2wp
For the free tier there is nothing else to set up: no key, no sign-up, no card. If you would rather not work in a terminal, you can run the same conversion in the html2wp desktop app (a guide with screenshots).
How to get your Lovable project onto your disk
The address of a live site is not a supported input, and that is on purpose. A copy of a published page keeps only the rendered result. It loses what the source code knows: which routes exist, what the components are and what the build produces.
So the input is a folder. Lovable syncs your project to a GitHub repository. Connect it, clone it, and you have the project locally. However the Lovable interface looks this month, the repository is what you want: the same files Lovable builds the site from.
git clone https://github.com/<you>/<your-lovable-project>.git
cd <your-lovable-project>
You don’t have to run npm install or a build first. The conversion does that itself.
Say “convert this project”
In that folder, with your agent open, type:
/html2wp:html2wp

convert this project
Codex has no slash command. Instead, tell it convert this project into a verified WordPress block theme and it finds the skill by itself. With Claude Code or Codex, that sentence is the whole instruction. You write no config file and you don’t choose a build command.
Flash takes about 30 minutes and Full about an hour, depending on the number of pages and how fast your computer is. It mostly runs unattended and reports where it is after every step, so don’t expect silence.
What happens to the React when you convert Lovable to WordPress
This is the step a Lovable project adds.
An older Lovable app (React and Vite) has a single index.html. Its body is an empty element the React app mounts into, plus a script tag, so there is nothing to convert. First the converter builds the project. Then a real browser walks through every route while a recorder watches. The result is flat HTML per route, exactly what the rest of the process needs. A newer project on TanStack Start already renders its pages on the server; the converter still builds it and walks every route the same way.
What the recorder captures
- State that only exists after JavaScript runs. Open accordions, dropdown contents, classes a script changes. The recorder stores them as data on the elements, and a small generic runtime plays them back. Nobody hand-writes them from memory.
- Scroll thresholds, to the pixel. A header that changes at
scrollY > 40uses a number somebody made up. The recorder finds it and works out exactly where it sits. A rounded guess would change the header at the wrong moment, forever. - “Only one can be open” relationships. You open A, then B. Did A close? Recording each element alone can’t tell, so the recorder tests it separately.
- Scroll-in animations survive. The recorder captures them, and the theme plays them back exactly like the original. Content stays visible without JavaScript, an element hides only while the runtime runs, and with
prefers-reduced-motionthe theme skips the animation. We measure the 1:1 match at rest, once the animations finish.
What it doesn’t fake
- Behaviour it couldn’t record goes on a list. Each page has its own. Read it.
This step has its own check, because no later check can see it. The converter screenshots every route live and compares it with its static capture at 1440, 820 and 390 pixels wide. If they differ, the step fails. Every later step measures from the capture to WordPress, so a defect made here would slip past them all.
The review you cannot skip
When the automated checks finish, the conversion is not over yet. The converter puts each page into one image next to its original, and you read every one from top to bottom.
In one conversion, a whole section lower down the page was missing, and the pixel comparison showed a difference of only 0.4%. That page passes the check without the section. By their nature, automated checks cannot see three kinds of defect. The first is a control that looks perfect but does nothing. The second is a value hard-coded from the one page a template came from. The third is anything that only shows up after you scroll, click or submit a form.
Also check whether you can edit the content, as well as whether it looks right. A page can match to the pixel, and yet the owner may still be unable to edit its FAQ or its feature grid. We saw this live: an accordion with five questions looked identical, but no editor offered it. A review that only looked at appearance let it through. So for every page, ask whether you can edit each repeating group and each block of text from wp-admin.
Install the theme
Your project folder gets a theme ZIP and, next to it, CONVERSION-REPORT.md. Nothing else. The working folder with the build sits outside your project, in a cache folder, so your repository stays clean. The report is the exception, because its reader is you. It lists what the conversion covered, what the review found, every warning (including the acceptable ones) and what is still open.
In WordPress, go to Appearance → Themes → Add New → Upload Theme, choose the ZIP and activate it. The theme stands on its own. Pages, blog, forms, menus, SEO and redirects are all its own code. It needs no plugin to run and never talks to any server of ours.
Editing the site after a Lovable to WordPress conversion: three routes
Blog posts become ordinary WordPress posts, so you write them in the block editor right away. Page text stays in your HTML, and for that there are two options worth knowing. One of them is a page builder.
| Route | What you get | What it costs you |
|---|---|---|
| The theme alone | Your code, unchanged. No plugin, no dependency, nothing to renew. Posts go through the block editor. | Without a plugin, page text changes in the HTML. If the client wants to edit it, Visual Edit does that (Lite is free). |
| Visual Edit, our plugin | You click a heading right on the page, type over it and save. You edit text, images, links, forms and menus where they are, and the code stays as it was. Lite is free and needs no key. | It is one more plugin installed on WordPress. Lite keeps 10 steps of history and has no AI chat. Pro costs €59 a year. |
| Elementor or another page builder |
Anyone who knows Elementor can rearrange the page alone, and plenty of people know it. For a client who will change the layout themselves, that familiarity has value. | The code is rebuilt as builder widgets, so it is no longer yours. After that, the site can’t render without Elementor, and you inherit its structure, its CSS and its updates. |
If you are converting so that the design survives, a page builder is exactly what destroys it. Moving a design into a builder by hand is the step after which the site stops looking like the design, and that is why this converter exists. But if the design is only a starting point and the client will rebuild half of it next quarter anyway, go ahead and give them Elementor.
Lite or Pro, if you choose Visual Edit
| Lite (free) | Pro | |
|---|---|---|
| Click-to-edit content | ✓ | ✓ |
| Forms, menus, SEO fields | ✓ | ✓ |
| Editing through AI chat | – | ✓, with your own API key |
| Theme export | – | ✓ |
| Turnstile form protection | – | ✓ |
| AI image editing and animations from images | – | ✓ |
| Edit history | 10 steps | 300 steps |
The AI chat in Pro runs on your own API key. We don’t sell you tokens, and you settle the cost of using them directly with your provider.
Lovable or WordPress? You don’t have to choose
People usually frame it as one or the other. For a content site, it doesn’t have to be. In Lovable you make a design fast. In WordPress a site lives for years and someone else edits it. The conversion keeps the first and moves the second. The theme runs on any WordPress hosting, so the site no longer has to live where you built it.
What moves is the website: pages, blog, forms, menus, SEO and redirects. What doesn’t move is the application behind it: sign-in, the database and calls to your own API. If your Lovable project is mostly that, keep it in Lovable. A shop sits in between. With a Pro licence, its catalogue becomes WooCommerce, as it did for Terra Studios.
What a Lovable to WordPress conversion costs and what it refuses
The free tier is open to everyone, with no key and no sign-up: three conversions of five pages each and five re-runs in total. Both numbers count per IP address, so an office sharing one address gets one allowance for everybody. The free tier is for trying the tool, personal sites and non-commercial work.
A Pro licence removes the page limit and makes conversions and re-runs unlimited. It also adds the step that turns a shop into WooCommerce. That step is not in the free tier at all: the app refuses a free conversion of a site with a shop outright, rather than doing half of it. Pro costs €49 a month or €490 a year, and the prices are on the pricing page. During the beta, the first payment is 30% cheaper and the key arrives by email.
Two refusals are worth knowing in advance. A React project whose routes exist only per record (/product/:id with no data to render) is a web app, not a site to convert. The converter refuses it openly instead of shipping one random instance of the template. And this is a beta: the checks catch most differences, not all of them. That is why the page-by-page review is part of the process and not an optional polish.
A step-by-step guide to the whole process is in the documentation for the html2wp app. The three Lovable conversions you can open at both ends are in the example at the start of this article.